MacOS : Create a User Module for Usine Hollyhock
Version 1.0 (29th April 2018) by Benoit Bouchez (alias iModularSynth)
Version 2.0 (20th November 2023): Overhaul
Version 3.0 (22nd May 2025) : Overhaul and update.
Introduction
This document is a short tutorial explaining how to create a user module for Usine using Xcode on MacOS platform. It is not meant to explain how Usine modules are working, the SDK User Manual made by Martin Fleurent is perfect for that.
The example given here was created for Usine Hollyhock 7 and ascendent compatibility is ensured.
Preparation
Before you begin, ensure that Xcode (v14 or later) is installed on your machine.
Download the Usine SDK from BrainModular's website and copy the entire directory to your hard drive. The SDK includes examples that help you understand how Usine operates and what’s required to develop your own modules. Each example comes with its Xcode project files, allowing you to explore the code and understand every key aspect of user module development.
We will concentrate here on the steps to follow to create modules from scratch (you can then copy source code from the projects in the SDK to have a good starting point).
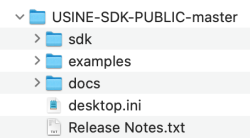
Once the SDK is copied on your hard drive, you should see the following structure in the SDK folder.
Technically, user modules are Dylibs (Dynamic Library), but certain project properties must be configured to ensure that Usine can load and use them properly. The screenshots in this tutorial were taken with Xcode 14. Other versions of Xcode may look slightly different, but the procedure remains the same.
Creating the project in Xcode
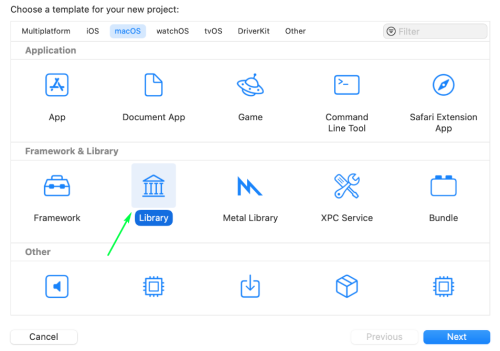
Start Xcode. Click on “Create a new Xcode project”. On the next page navigate to the “MacOS” tab, click on “Library” under the “Framework and library” header :
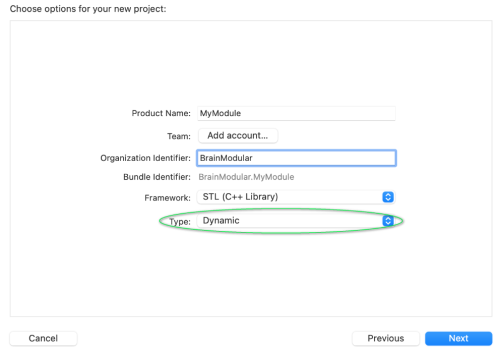
Next, choose the wanted name of the module as well your company’s name and make sure the type at the bottom of the page is set to “dynamic” :
Xcode will create some dummy files. Feel free to keep or discard them.
Including Usine's SDK
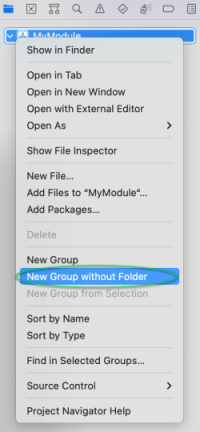
Right click on your project at the top of the project navigation bar at the left of the Xcode window then select “New group” and change its name to “SDK” (this step is not mandatory per say but tidy code is important):
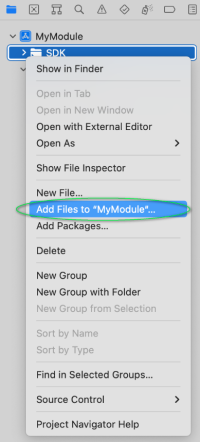
Right click on the newly created “SDK” group then select “Add files to “YourProject”…” :
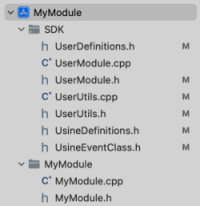
Navigate to the location of the Usine SDK on your computer and select every file in the “sdk” subfolder (shift + left click) and add them. Now add your own class to the project and you should now have a similar architecture to this :
The structure of your project is now complete however you now need to configure build settings before you can use your module in Usine. Setting the build settings Due to the need to build for two different architectures on MacOS (Intel and Silicon) you may need to set up multiple targets:
- Universal, works for both architectures.
- __x86_64__, for machines using an Intel processor (deprecated).
- arm64, for machines using an Apple Silicon processor (deprecated).
Universal binaries are a newish concept in MacOS development, they allow you to compile only once, do not require multiple targets and simplify distribution. This is obviously the preferred way to build modules currently, but as of now and for the foreseeable future, library support for universal binaries is sloppy to nonexistent and building universal binaries with external libraries can prove to be simply impossible.
Point being, you should always try to build universal binaries.
In the coming example, we will set up a universal binary build, additional instructions for architecture specific targets will be given thereafter.
Building a universal binary
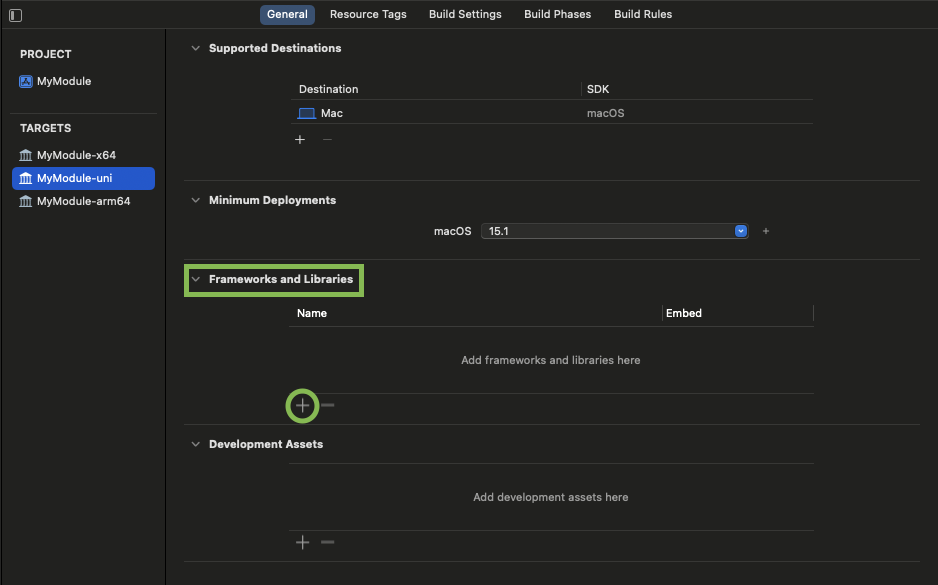
Left click on your project at the top of the project navigation bar and look at the “TARGETS” header on the left. Xcode should have created one target by default. If your project requires dilybs, you can add them to the "Frameworks and Libraries" panel in the "General" tab of your target. You also need to copy them to the bin folder in Usine’s contents :
To make sure that you build a universal binary, you will need to check some settings in the "Build Settings" tab for the target and the project :
-
"Architectures" should by default be set to
Standard Architectures (Apple Silicon, Intel) - $(ARCHS_STANDARD) -
"Build Active Architecture Only", set to
No.
-
"Executable Extension", set to
usr-macos64uni.
-
Clear the "Executable Prefix" line to remove
lib.
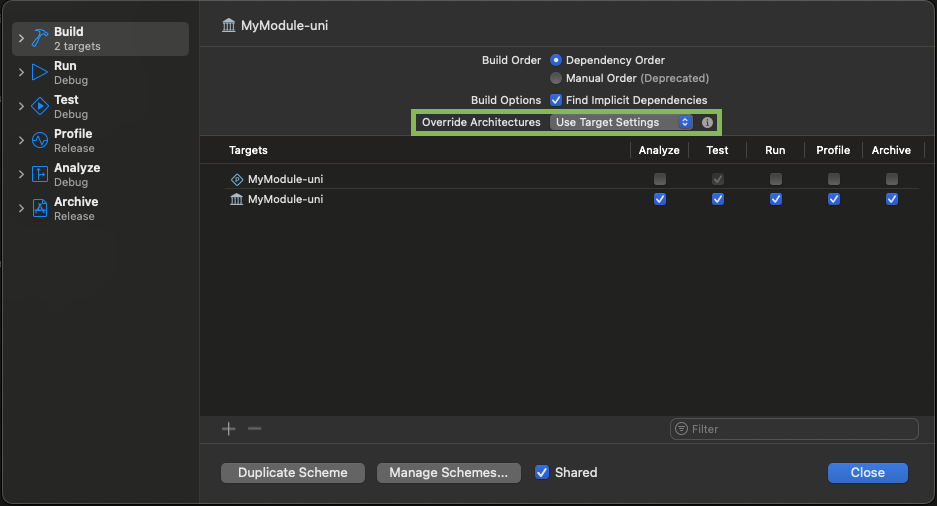
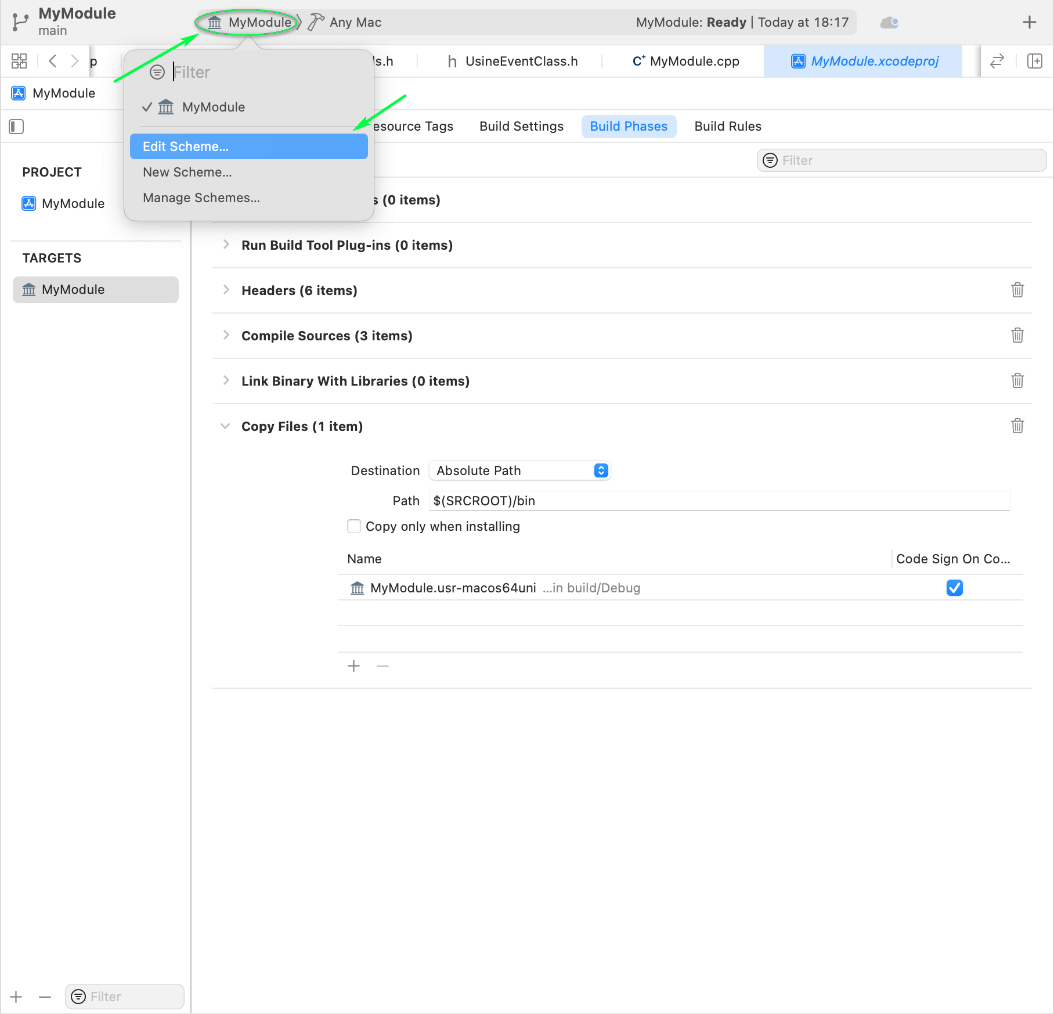
Now, you need to modify a build option in your scheme. At the top of your screen, go to the Product menu, then select Scheme and Edit Scheme.
In the Build panel, change the "Override Architectures" from Match Run Destination to Use Target Settings.
Copy Files Phase
To make the built binary easily accessible you should create a copy files phase at the end of the build in Xcode. To do so, navigate to the “Build Phases” tab and click the “+” at the top of the page and “New Copy Files Phase” :
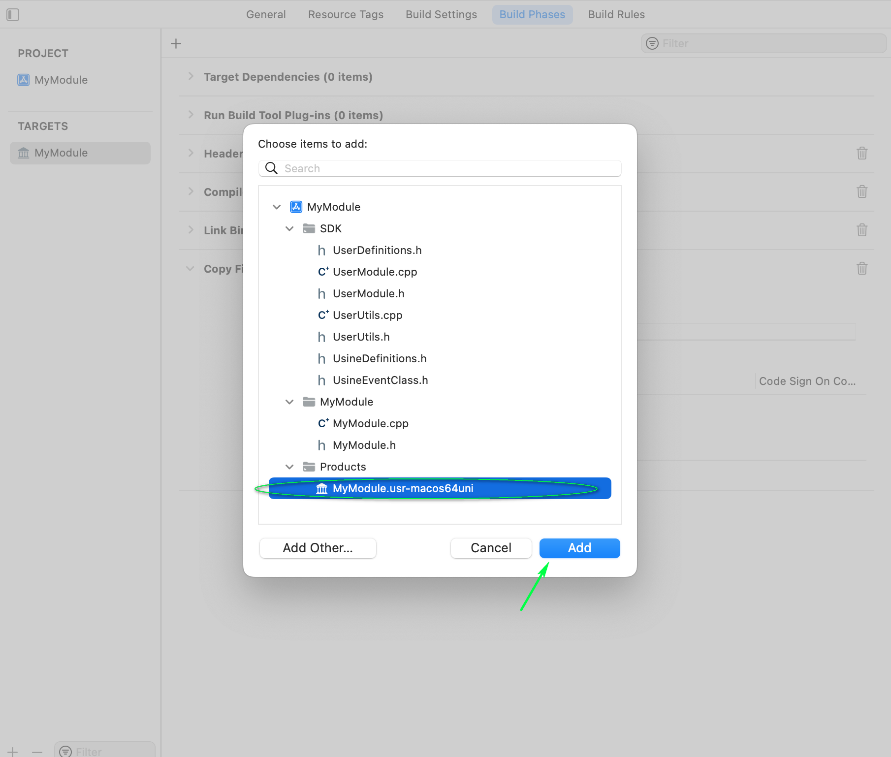
 Hit the “+” button at the bottom of the new “Copy Files” section and select your product :
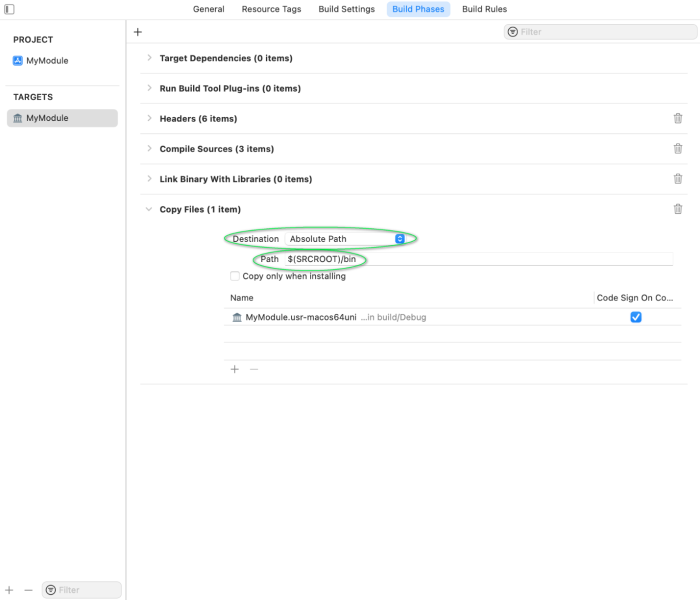
Set the destination to “Absolute Path” and enter the wanted path below, to make the path relative to the project’s root you can use $(SRCROOT), for example $(SRCROOT)/bin will output the binary in a ./bin subdirectory where your Xcode project is located. Your copy file phase should now look something like this:
Other targets
Only a few settings must be changed to build for Intel or Silicon specifically instead of universal, as such we will only go over the needed settings here. The settings omitted here can be inferred from the above example. Also note that to add another target to a project on which you’ve already set up a target you can right click a target to duplicate it.
Beware that Xcode doesn’t allow same name targets and that the binary will inherit the name of the target that built it. If you don’t want this (which is probably the case), navigate to the build settings of your target and change the “Product Name” to reflect your wanted name.
Building an Intel only binary
First, set the extension to “usr-osx64” :

Then change the "Architectures" build setting from $(ARCHS_STANDARD) to x86_64

Building an arm64 binary
First, set the extension to “usr-osxarm64” :
 Then change the "Architectures" build setting from __$(ARCHS_STANDARD) to arm64__

Debugging your module
You can compile your module and debug it directly in Xcode while Usine is running. You can then put breakpoints, go step-by-step, etc... in your code and debug it efficiently.
To use Xcode debugger, you need to declare the application used to start your module (don't forget that a user module in Usine is nothing than a dylib, it then can't run by itself)
Go to Product menu, then select Scheme, then Edit Scheme :
Click on Run tab on the left side. Click on Executable list, then select "Other". A file selection dialog will open. Locate the Usine application on your disk and click on "Choose" button when the application is selected.
Once your module is compiled in Xcode, click on the "Run" arrow on top of Xcode window. Usine will then start. You can use all Xcode’s debugging features (breakpoints, step by step, etc...).
See also
version 7.0.250121
Edit All Pages